Angkor Wat Siem Reap Cambodia 

A Complete Guide to Cambodia’s New e-Arrival Card (EAC): Step-by-Step Instructions for Travelers

By globedrifters Vietnam/Cambodia

A Complete Guide to Cambodia’s e-Arrival Card (EAC): Step-by-Step Instructions for Travelers

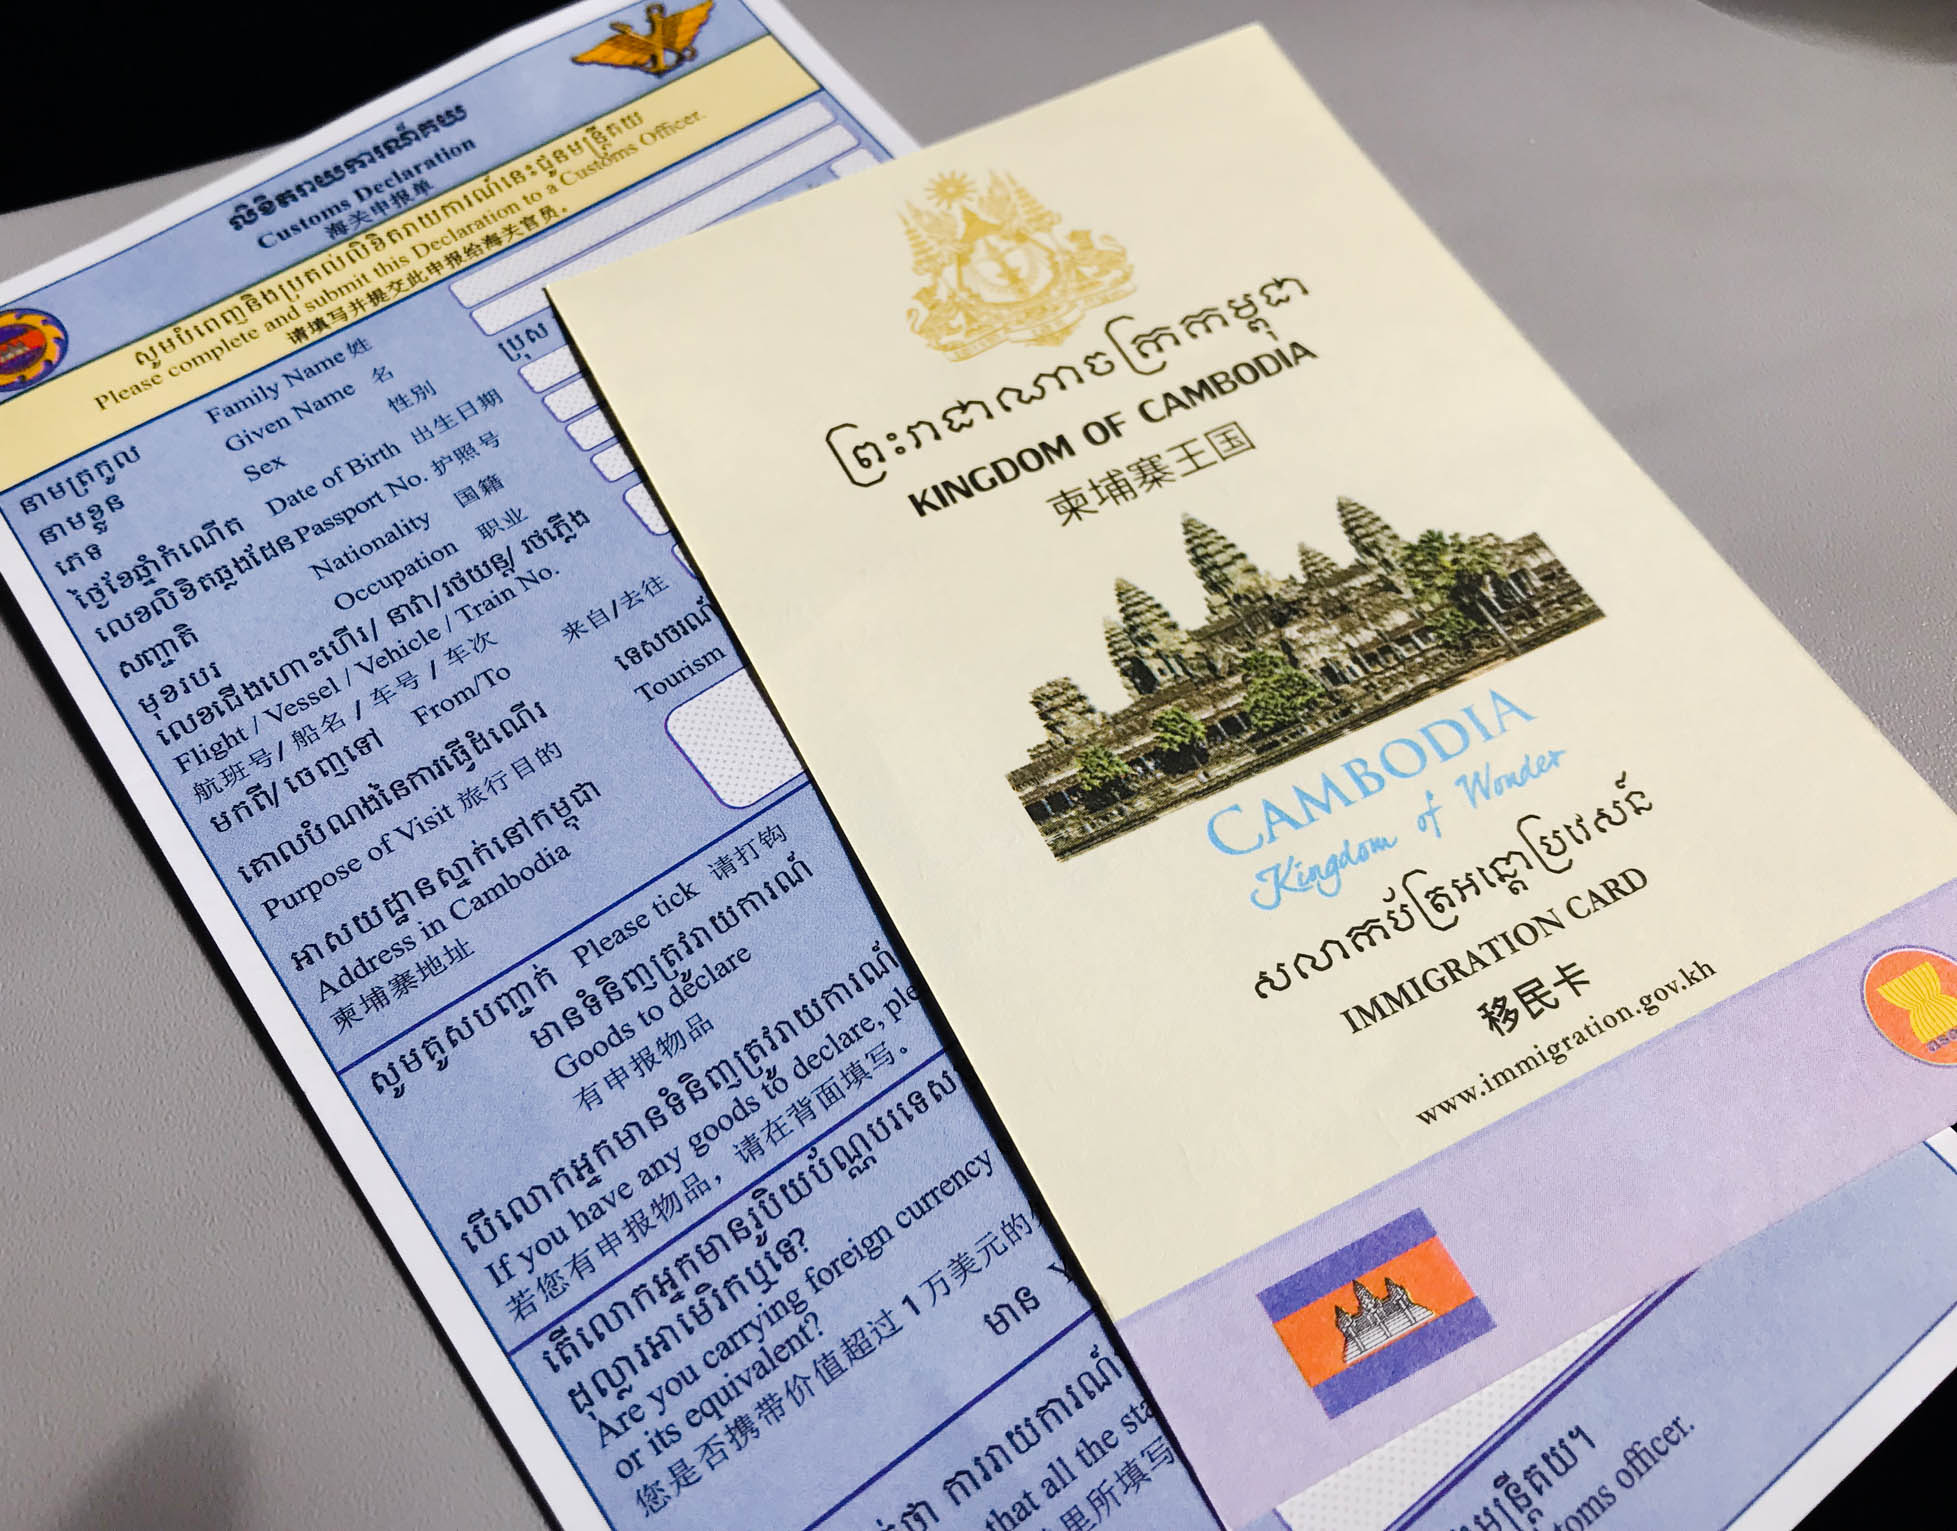
Welcome to your comprehensive guide on obtaining the Cambodia e-Arrival Card (EAC), a streamlined system designed to simplify your arrival process in Cambodia. This digital card replaces the paper Immigration Form, Health Form, and Customs Declaration, offering travelers a single, convenient portal. Please note that the Cambodia e-Arrival Card is not an e-visa.

All travelers arriving by air must complete the Cambodia e-Arrival Card. In addition, most travelers will also need a visa to enter Cambodia, which you can obtain in advance as an e-visa or upon arrival at the airport. Completing the e-visa in advance  can help you avoid long wait times at the airport, therefore it’s advisable to complete it before your arrival.

Important Submission Guidelines

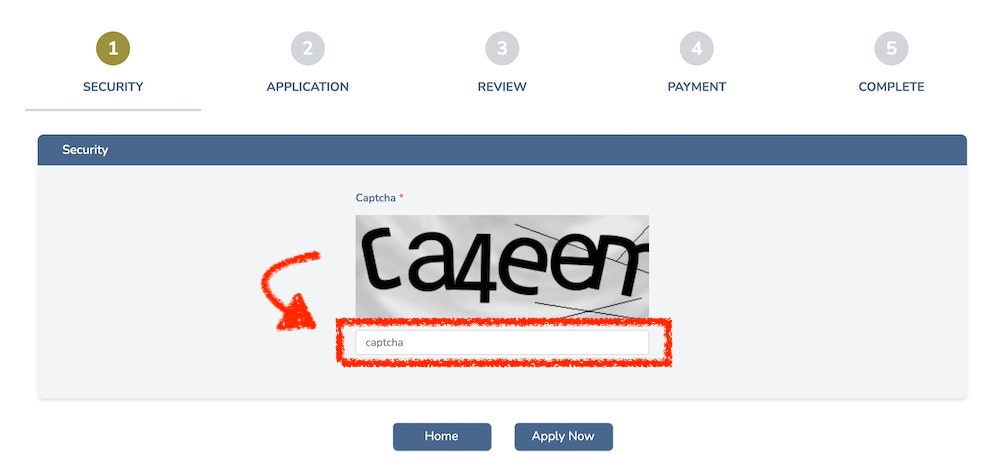
You can submit the Cambodia e-Arrival Card anytime within the 7 days before your arrival date. Submissions earlier than that are not possible. For more information and FAQs about the Cambodia e-Arrival Card, visit the Cambodian government’s official website.

Note: The Cambodia e-Arrival Card is currently required only for air travelers. Those entering by land still complete paper forms at border crossings.


Step-by-Step Instructions for the e-Arrival Card (EAC)

Note: Only fields marked with an asterisk (*) are mandatory.

1.) Access the Cambodia e-Arrival Card portal

Click on this link: https://www.arrival.gov.kh/ to access the portal.

2.) Click “Submit e-Arrival”

Choose “Sign In Without Account” if you prefer not to register an account.


Step 1 Cambodia e-Arrival Card

3.) Click “Sign In Without Account”
Step 2 Cambodia e-Arrival Card

4.) Upload Your Photo

Click in the circle above “Photo Portrait.” Select your saved photo.

*Tip: Save a clear photo of just your face (no full-body shots) to your computer. Crop your photo so it only shows your face and not your entire body. 

Step 3 Cambodia e-Arrival Card

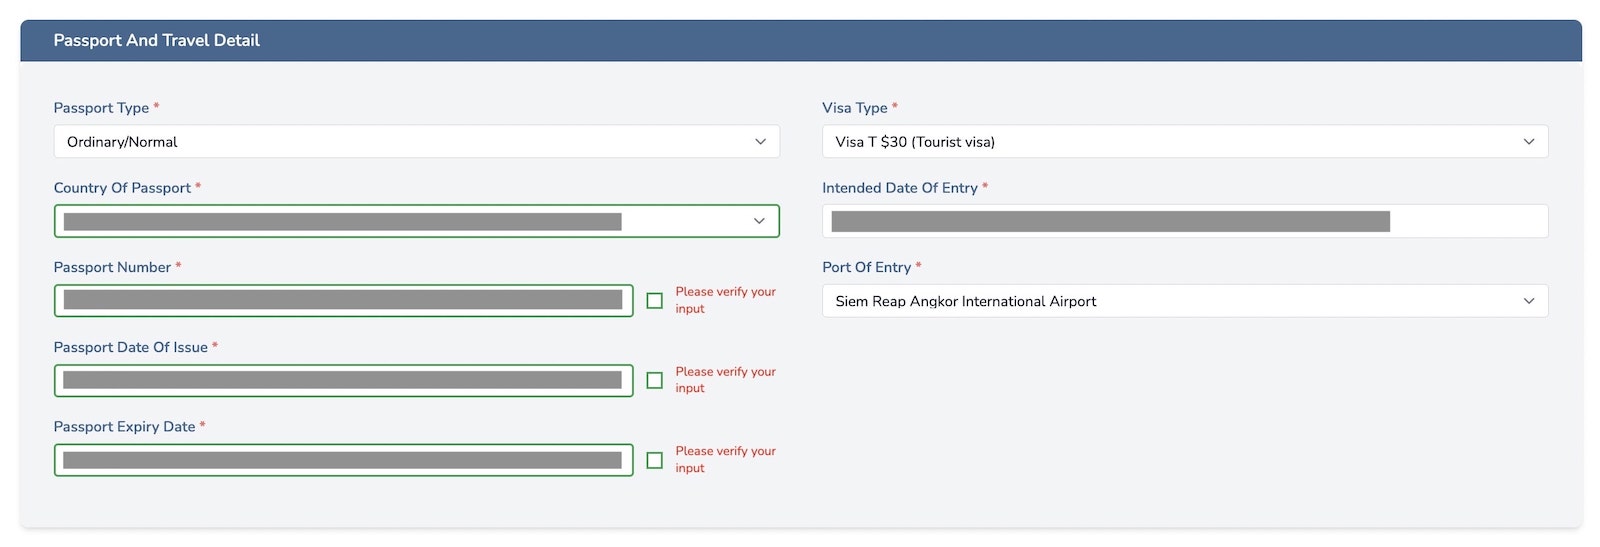
5.) Enter Passport Information

Fill in your:

  • Passport Number

  • Issuing Country

  • Passport Type

  • Passport Expiry Date

  • Surname

*Make sure these details exactly match your passport.

Step 5 Cambodia e-Arrival Card

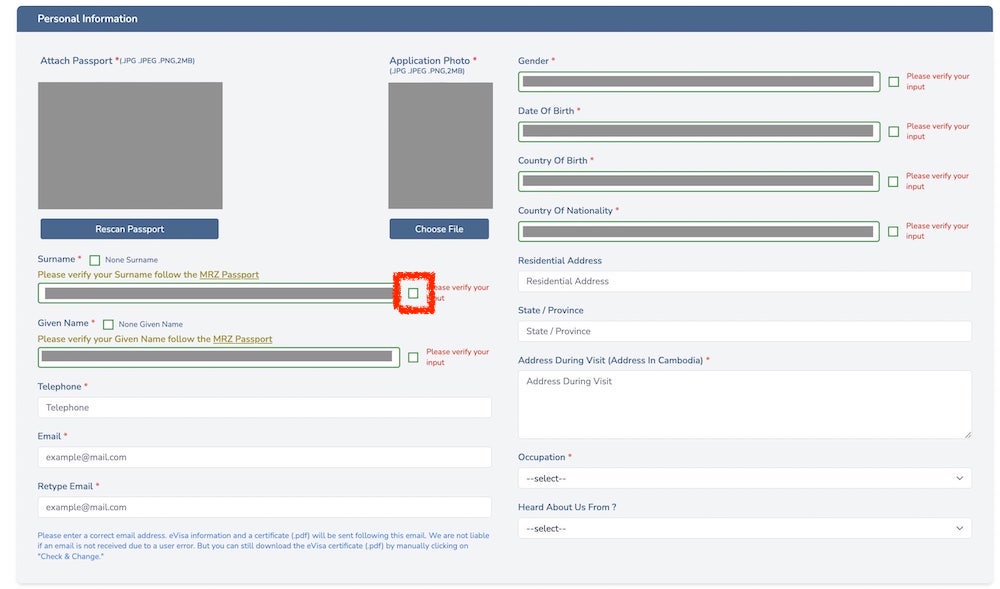
6.) Enter Personal Information

Provide your:

  • First & Middle Name(s)

  • Gender

  • Date of Birth

  • Birth Country

  • Occupation

*Again, enter these details exactly as shown in your passport. For Occupation, you can select “Other” and type in your job title or “Retired.”

Step 6 Cambodia e-Arrival Card

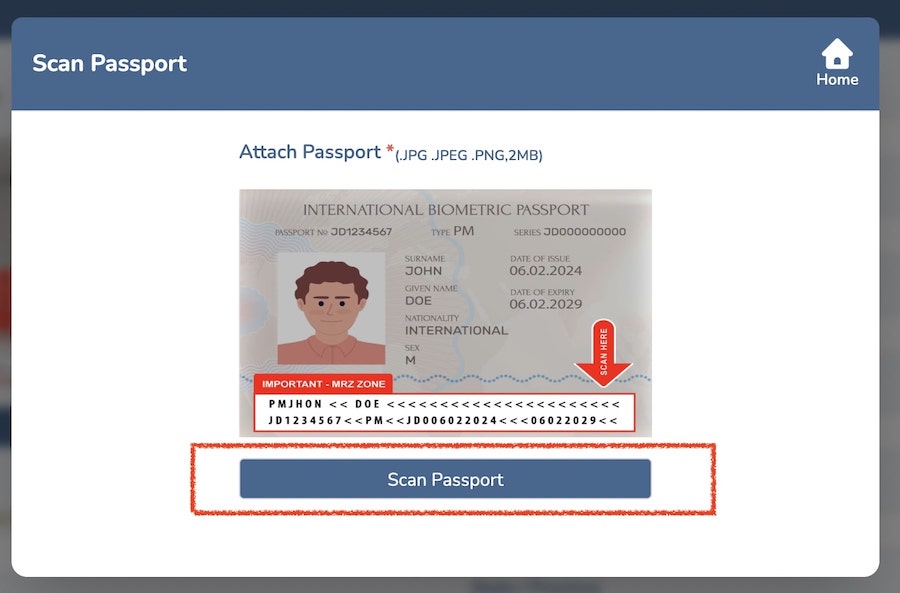
7.) Upload Passport Information Page

Upload a clear photo or scan of the information page of your passport.Step 7 Cambodia e-Arrival Card

8.) Enter Your Phone Number

Enter your phone number. Select your country code first. Click “Next.”Step 8 Cambodia e-Arrival Card

9.) Enter Your Email and Visa Info

  • Enter your email address.

  • Review your Issuing Country and Passport Type.

  • If you already have an e-visa, check “Already has a visa” and “Valid e-Visa.”

  • If you plan to get a Visa-on-Arrival instead, leave those boxes unchecked.

Click “Next.”
Step 9 Cambodia e-Arrival Card

10.) Enter Your Arrival & Departure Dates

Select your Date of Arrival and Date of Departure from Cambodia. Click “Next.”

Remember: You can only submit this form within 7 days of your arrival.

*If you’re on a Globe Drifters trip, we’ll send you your arrival and departure dates.


Step 10 Cambodia e-Arrival Card

11.) Enter Travel Details

Provide:

  • Port of Entry

  • Travel Purpose

  • Type of Air Transport

  • Flight Number

*If you’re on a Globe Drifters trip, your Port of Entry will usually be “Siem Reap Angkor International Airport (SAI),” and we’ll send you your flight number. Most travelers select “Holiday/Pleasure/Vacation” for Travel Purpose and “Commercial” for Type of Air Transport.

Step 11 Cambodia e-Arrival Card

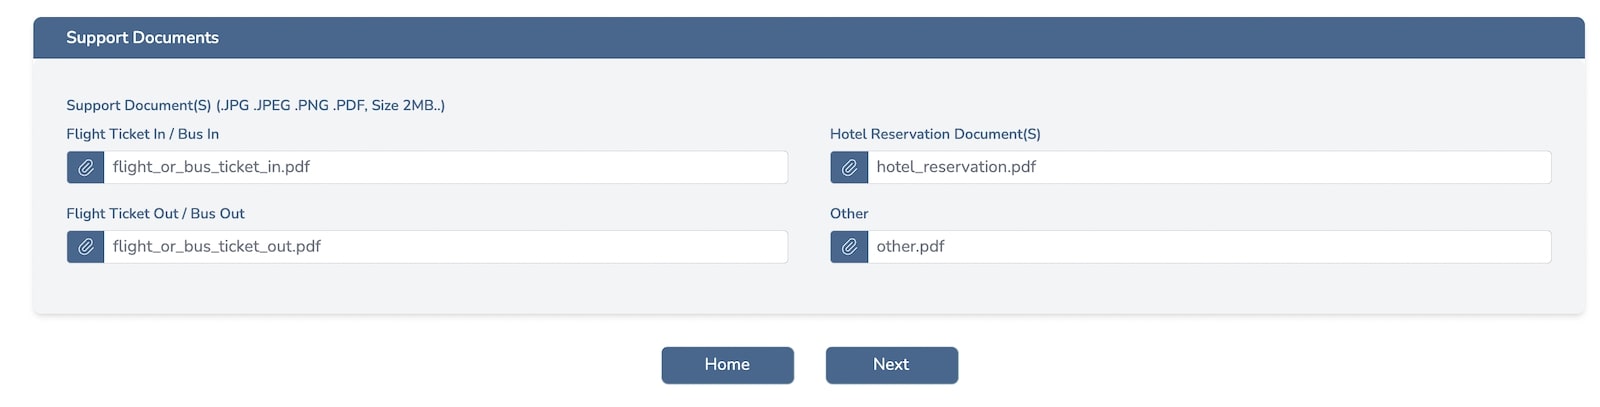
12.) Skip Flight Ticket Upload

Click “Next.”
Uploading your flight ticket documents is optional and not required.


Step 12 Cambodia e-Arrival Card

13.) Enter Accommodation Details

Fill in your:

  • Accommodation Type

  • Hotel Name

  • Hotel Contact Number

  • Hotel Province

The hotel address is not required. Click “Next.”

If you’re on a Globe Drifters trip, we’ll provide all the details you need. Most travelers select “Hotel” for Accommodation Type.


Step 13 Cambodia e-Arrival Card

14.) Enter Travel Route Before and After Cambodia

Provide:

  • City you’re coming from before arriving in Cambodia

  • City you’re traveling to after leaving Cambodia

Click “Next.”

For Globe Drifters travelers, your Port of Embarkation before Cambodia will often be “Danang, Vietnam.” Your Port of Disembarkation after Cambodia will be the next city on your itinerary, found in your flight details.


Step 14 Cambodia e-Arrival Card

15.) Complete Health Information

Answer the questions in the Health Information section. Click “Next.”Step 15 Cambodia e-Arrival Card

16.) Review Customs Declaration

Review the duty-free allowances. Select Yes or No for each question. Check the box next to:

“I hereby confirm that all the statements in this declaration are true and correct.”

Click “Next.”


Step 16 Cambodia e-Arrival Card

17.) Review and Agree to the Declaration

Read the declaration carefully. Check the box:

“I have read and agreed to the declaration.”

Click “Submit.”
Step 17 Cambodia e-Arrival Card

18.) Save and Print Your QR Code

After submission:

✅ Print a paper copy of your Cambodia e-Arrival Card QR code.
✅ Save a digital copy on your phone.

Your QR code and your visa (either e-visa or visa-on-arrival) are required to enter Cambodia. Having both documents ready will help speed up your arrival process. Print a copy of each and save a copy of each on your phone, just in case!

Step 18 Cambodia 3-Arrival Card


With this complete guide to obtaining your Cambodia e-Arrival Card, plus your visa arrangements, you’ll avoid long lines and enjoy a smoother entry into this beautiful country. Happy travels!


How to Get a Visa for Cambodia

By globedrifters Vietnam/Cambodia

How to Get a Visa for Cambodia

Visas are one of the main worries when planning to travel abroad — and that’s totally understandable. If you get it wrong, it can cause big headaches!

Luckily, getting a visa to enter Cambodia is pretty straightforward. This guide will walk you through everything you need to know so you can stop stressing and get on with planning your trip.


Do I Need a Visa for Cambodia?

Most travelers—including those from the US, Canada, the UK, and Australia—will need a visa to enter Cambodia. If you’re not sure whether you need one, it’s best to check with your nearest Cambodian embassy or consulate.

face angkor wat


What is the Cambodian E-Visa?

The Cambodia e-visa is an official travel document allowing you to enter and travel within Cambodia. For many travelers, this online process is far easier than visiting an embassy or consulate for a traditional Cambodia visa application.

  • Cost: About $30 USD plus a $6 processing fee (total around $36 USD).

  • Processing time: Usually 3–5 business days after submitting your application.

  • When to Apply: You should apply no earlier than 90 days before your arrival date. If you try to apply earlier, you may not be able to submit your application. Applying 2 to 4 weeks ahead usually gives plenty of time to process your visa.

  • Validity: Your Cambodia e-visa will be valid for a single entry and for 30 days.

  • Where to Apply: You can apply on the official government website at https://www.evisa.gov.kh/application_new.

⚠️ NOTE: Above is the only official government e-visa portal for Cambodia. There are many other websites out there that offer e-visa services at double the price or more. We do not vouch for the legitimacy or service of these 3rd party websites.


How to Apply for the Cambodian E-Visa: Step-by-step Instructions

Ready to get your visa sorted? Here’s exactly how to apply for your Cambodia e-visa in a few easy steps.

1.) Visit the Official Portal

Go to: https://www.evisa.gov.kh/application_new. Enter the Captcha code and click “Apply Now”.

2.) Enter the Captcha Code and Start your Application

When you open the page, you’ll see a big grey box with some letters and numbers—that’s called a Captcha. Below it, there’s a white field labeled “captcha.” Type the letters and numbers exactly as you see them, matching uppercase and lowercase. Once you’ve entered them, click the “Apply Now” button just below.

*NOTE: If you receive a message saying the captcha code is incorrect, it means the letters and numbers you entered didn’t match the ones shown on the screen. Be sure to enter the code exactly as you see it, paying attention to both lowercase and uppercase letters. A new code will appear each time you try, so enter the new code and click “Apply Now” until it goes through successfully.

3.) Upload Your Passport

After clicking “Apply Now,” a page will open asking you to upload your passport. Click the “Scan Passport” button and select a saved photo of your passport from your device.

*NOTE: Accepted formats are .jpg, .jpeg, and .png, with a maximum file size of 2 MB.

4.) Enter Your Personal Information

After uploading your passport, a page will appear where you’ll need to enter your personal information. The system may automatically recognize and pre-fill some of your details. Carefully check that all pre-filled information matches your passport exactly (e.g. middle names).

If the information is correct, click the green boxes next to each field to confirm. If anything is incorrect or incomplete, make the necessary changes first, then click the green box to save your updates.

Next, fill in any remaining fields marked with a red asterisk (*).

NOTE: Your “Address in Cambodia” should be the name and address of your hotel, Airbnb, or other accommodation. If you’re joining one of our Vietnam/Cambodia tours, we’ll provide you with your hotel details before it’s time to submit your visa application.

5.) Enter Your Passport Information

Scroll down to the next section and repeat the same steps as before with your passport information. Verify all details and complete any fields marked with a red asterisk (*).

For “Visa Type,” if you’re traveling for tourism, select “Visa T $30.” Check your flight itinerary for your “Intended Date of Entry” and enter the date you arrive in Cambodia (not your departure date from your original location).

In the “Port of Entry” field, choose the airport if you’re flying, or the checkpoint if you’re entering by land.

If you’re on one of our Vietnam/Cambodia tours, your “Port of Entry” will be “Siem Reap Angkor International Airport.”

The next section asks for supporting documents, but uploading them is optional. If you choose not to upload any, just make sure all your previous information is correct, then click “Next.”

6.) Review Your Information

On the next screen, you’ll see a summary of all the information you entered. Double-check everything one last time, then check the box next to “I agree with the terms and conditions” before clicking “Submit.”

After submitting, you’ll receive an email confirming that your information was received along with your reference number. If it’s not in your inbox, be sure to check your spam folder. You can use this reference to access your application later if you need to make any changes.

7.) Make Payment and Submit

Next, you’ll be prompted to proceed with payment. Select your preferred payment method by clicking its icon, then click “Confirm.”

Enter your payment details. Click “Pay Now”.

That’s it! Your e-visa application is now complete.


After Submitting Your Cambodia Visa Application: What to Expect

After submitting your aaplication, you will receive an email within 3 – 5 business days at the most with the decision about your visa. If your visa is approved, you will receive your visa directly in the email as a downloadable PDF document. 

Once you receive it, be sure to print a copy of your e-visa and carry it with you when you travel to Cambodia — it’s required for entry.

NOTE: In case your application is denied, common reasons include typos or unclear passport photos. Unfortunately, there are no refunds for denied applications, but you can usually reapply.

cambodian evisa


We know everything related to visas can be stressful and frustrating. However, by following these simple steps, you’ll have your e-visa ready quickly—giving you peace of mind before your trip.

Don’t forget, along with your visa, you’ll also need to complete the Cambodia e-Arrival Card. For more details, be sure to check out our blog on how to get the Cambodia e-Arrival Card. Happy travels!

Vietnam halong bay 

How to Get a Visa for Vietnam

By globedrifters Vietnam/Cambodia

How to Get a Visa for Vietnam

Getting a visa for Vietnam is required for many travelers. Most don’t need to apply at a consulate or embassy though. For most visitors to Vietnam, the e-visa is the most convenient visa option.


Do I need a visa for Vietnam?

Most travelers will need a visa to enter and travel within Vietnam. This includes travelers from the US, Canada, and Australia. If you’re not from one of these countries and are unsure whether or not you need a visa for Vietnam, it’s best to contact your nearest Vietnamese Embassy or Consulate. 

vietnam hanoi train street


Do I need an e-visa for Vietnam?

US, Canadian, Australian, New Zealand, and South African passpot holders will need an e-visa to enter and travel within Vietnam. You can see all countries that are eligible to apply for a Vietnam e-visa here.

The Vietnam e-visa is a travel document that will allow you to enter and travel within Vietnam. The cost is approximately $25 USD. You will usually receive your e-visa anywhere from 3 ~ 5 business days after submitting your application and payment. 

It’s best to apply for your Vietnam e-visa 90 days or less before your Vietnam arrival date. If you try to apply sooner, you may not be able to submit your application. If you apply 2 – 4 weeks before your trip, you will usually have plenty of time to fill out the application, make payment, and receive the e-visa. 


How do I get an e-visa for Vietnam?

Please see the step-by-step instructions below. Note that if your visa is denied, you may not receive any explanation as to why it was denied. The most common reasons for visa denial are typos in the data you entered in the application or an unclear/illegible picture of your passport. There are no refunds for denied visas and you can usually apply again if denied. 

IMPORTANT: You must print a paper copy of your e-visa to bring with you upon your arrival in Vietnam.

Go to official Vietnam E-visa website:

Go to: https://evisa.gov.vn/. Click “Apply Now”.

Read instructions:

Click the 2 boxes at the bottom. Click “Next”.


Upload your passport photo:

Under “Portrait photography”, click “Choose file” to upload your passport photo. (Must be a recent photo, 4×6 cm, jpg/jpeg format, and file size must be 2 MB or less.)


Upload your passport page:

Under “Passport data page image”, click “Choose file” to upload your passport information page.

Enter your personal information:

After uploading your photo and passport, some personal information may be auto-filled. Verify that it is correct and fill in all other fields with an asterisk* by them as they apply to you. (You can leave the ones without an asterisk* blank.) Where applicable, fill in the information exactly as it appears in your passport.

NOTE: Pay close attention to the date format. It is DD/MM/YYYY.

Enter information about your trip:

You only need to fill in the fields with an asterisk* by them. (You can leave the ones without an asterisk* blank.) Where applicable, refer to your flight itinerary and hotel reservation. If you’re on a Globe Drifters tour, we’ll email you these details. Don’t forget to check the box at the bottom of the form and click “Next”.

NOTE: The Hanoi airport is known as Noi Bai.


Review your application:

Make sure all of your information is correct. Enter the Security code and click “Next”.

A pop-up window will appear:

Review the information and click “Confirm”.

You will also get an email:

This will confirm receipt of your information and contain your registration code. If you don’t see it in your inbox, try your spam folder. Now, you’ll need to pay for your visa.

Proceed to payment:

Review all the information to make sure it is correct. Check the box “I agree to pay” and click “Payment”.

You will be re-directed to a payment page:

Select “Pay by Visa/Mastercard/JCB/Amex”. Click on the type of card you have.

NOTE: The ATM card option is mostly for locals. It will not be an available option for many of you. 

Enter your card details:

Click “Continue”.
vietnam e-visa payment page

You’re all paid up:

You’ll get a message similar to the one below and/or an email saying that you’ve paid. Click “OK”.

Receive your e-visa:

Usually after about 3 business days, you will usually receive an email notifying you that you’re approved for the Vietnam e-visa. You’ll also receive instructions on how to download it. Once you’ve downloaded it, be sure to print a copy and bring it with you for your arrival in Vietnam!

NOTE: It may take more than 3 business days to receive your e-visa. 
vietnam e-visa document


We know everything related to visas can be stressful and frustrating. However, getting a Vietnam e-visa Vietnam is pretty easy and straightforward. Just read the instructions carefully and follow the prompts. Happy travels!

halong bay vietnam 

Getting from Hanoi Noi Bai Airport to the Old Quarter

By globedrifters Vietnam/Cambodia

Getting from Hanoi Noi Bai Airport to the Old Quarter

Planning a trip to Vietnam? Here’s how to get from Hanoi Noi Bai Airport (HAN) to the Old Quarter (Hoan Kiem), one of the city’s most vibrant and historic neighborhoods.

Most travelers to Vietnam arrive at Hanoi Noi Bai International Airport, located about 15–20 miles (25–30 kilometers) from the Old Quarter. Depending on traffic and weather conditions, the drive can take anywhere from 30 to 60 minutes. Costs vary widely depending on the Hanoi airport transfer option you choose.

If you’re signed up for one of our trips to Vietnam and Cambodia, airport pick-up is not included. You can use this information to choose the best way to get to Hanoi’s Old Quarter and begin exploring Vietnam’s fascinating culture and cuisine with us!

*Globe Drifters does not recommend one option over another. It’s best to do your research and weigh the pros and cons to decide what works best for you.


Arriving at Hanoi Noi Bai Airport (HAN)

Go Through Immigration

Once you land, follow the signs for “Arrival Immigration.” The airport layout is fairly straightforward, and crowds usually move in the same direction, making it easy to navigate.

Head to one of the immigration counters under the green sign marked “All Passengers.” Have your passport and printed e-visa ready, if required for your nationality (Check out our blog for a step-by-step guide on how to get your Vietnam e-visa.). Lines can be long depending on how many flights arrive at once, but they typically move steadily.

Hanoi Noi Bai Airport Immigration

Stand in line at an immigration booth with a green sign that says “All Passengers”.

Collect your Luggage

After immigration, check the overhead screens for your flight number to find your baggage carousel. Retrieve your bags and make sure to double-check your luggage tags before leaving the area.

Hanoi Noi Bai Airport Luggage Claim

The screens after the immigration booths will have your arrival flight information and luggage carousel number.

Pass through Customs 

Once you have your bags, proceed through customs. Customs officers might briefly scan your bags, but generally, the process is quick unless you’re flagged for inspection.

Hanoi Noi Bai Airport Customs

Pass through customs.

Exit to Arrivals Hall

After customs, you’ll enter the public arrivals hall. From here, you’re ready to choose your Hanoi airport transfer and begin your adventure in Vietnam!


3 Easy Ways to Get from Hanoi Airport to the Old Quarter

Now that you’re officially in Vietnam, it’s time to decide how you’ll get to the Old Quarter. Let’s look at your options for getting from Hanoi Noi Bai Airport to the Old Quarter.

NOTE: For those on our Vietnam/Cambodia trip, we’ll put you in touch with one another before the trip starts so you can share flight arrival times and maybe split a ride. We’ll also send hotel details in the pre-trip notes so you have the address handy for your driver.

Option 1: Pre-Arranged Airport Pick-Up

Estimated Cost: 300,000 – 500,000 VND ($12 – $20 USD)
Travel Time: 30 – 60 minutes

Booking a pre-arranged airport transfer is one of the smoothest ways to reach the Old Quarter. Companies like Welcome Pickups or one that you may find on travel sites such as TripAdvisor.

When pre-arranging an airport pick-up, a private driver will typically be waiting for you just beyond the baggage claim area in the arrivals hall, holding a sign with your name. Be sure to confirm the exact meeting point and any identifying details with your transfer company in advance so you’ll know who and what to look for.

Hanoi Noi Bai Airport Arrivals

After you collect your luggage and exit baggage claim, you’ll usually see your driver here.

A key advantage of this option is knowing the fixed price in advance without needing to negotiate. It’s a good choice for peace of mind, though it tends to be one of the more expensive options.

IMPORTANT: It’s a good idea to download and set up WhatsApp on your phone before arriving in Vietnam. Once you land, you can use the free Wi-Fi at Hanoi Noi Bai Airport to contact your driver. If the Wi-Fi isn’t working, you can turn on data roaming, but keep in mind your phone provider may charge extra fees.


Option 2: Take a Private Transfer on Arrival

Estimated Cost: Around 500,000 VND (≈ $20 USD)
Travel Time: 30 – 60 minutes

Booking a private transfer on arrival is another easy way to reach the Old Quarter. Once you exit customs, you’ll see several small kiosks in the arrivals hall offering private transfer services, often with prices clearly displayed.

Hanoi Noi Bai Airport Transfers

An example of one of the few kiosks that offer private transfer services.

When arranging a private transfer at the airport, you can speak directly with staff at these counters and secure a ride right away. It’s helpful to have your hotel name and address written down to show the driver and avoid any confusion.

The main advantage of this option is flexibility, since you don’t need to book in advance and can compare prices on the spot. It’s slightly more expensive than taking a taxi, but it still offers a simple and direct way to get into the city.

Hanoi Noi Bai Airport ATMs

A few ATMs are available in the arrivals area of Hanoi airport.

NOTE: If you need cash, there are money exchange kiosks nearby, though rates and fees can be high. For a better deal, only exchange or withdraw a small amount at the airport and wait until you’re in town for larger transactions.


Option 3: Take a Taxi

Estimated Cost: 250,000 – 400,000 VND ($10 – $16 USD).
Note: It is customary for drivers to add an airport exit toll of about 20,000 VND to your fare.
Travel Time: 30 – 60 minutes

Taking a taxi from Noi Bai Airport to the Old Quarter is one of the cheapest options, though it’s not a whole lot cheaper than some other choices.

After you step into the arrivals area, just follow the “Taxi” signs with arrows that lead you outside to the official taxi line.

Hanoi Noi Bai Airport Taxi

Look for the taxi signs on the exit doors of the baggage claim area and follow the arrows.

You’ll know you’re in the right place when you see a row of taxis and a big neon sign showing the taxi brands and fares. Taxis run 24/7, so you can grab one no matter what time you get in.

Hanoi Noi Bai Airport Taxi

Look for the line of taxis and this big neon sign!

Like in lots of cities around the world, taxi scams happen in Vietnam too. To stay safe, be polite but firm, and always ask the driver to use the meter. It’s also a good idea to have your hotel name and address written down to show the driver. While Globe Drifters doesn’t recommend any specific company, Mai Linh and Taxi Hanoi are generally reliable options.


*Note from the author: Taking a taxi from the Hanoi airport to the Old Quarter can be overwhelming, especially after a tiring, long-haul international flight. When you arrive at the taxi line, you’ll probably have taxi drivers and middlemen swarming around you and insisting that you take a taxi. If you really want to save a few bucks, then a taxi is your best bet.


Tipping

Tipping isn’t required in Vietnam, but it’s always appreciated, especially if your driver helped with heavy luggage or made your ride extra pleasant. Around 20,000 – 50,000 VND (about $1 – $2 USD) is a nice gesture, depending on how much help you had and how heavy your bags were.


Taxi Scams

As mentioned above, taxi scams can happen in Vietnam, just like in many other places around the world. If it does occur, it usually won’t cost you more than an extra $5–$10 USD. So if you find yourself overcharged, try not to let it spoil your trip—it happens even to experienced travelers, and there usually isn’t much recourse. Our advice is to let it go and look ahead to all the incredible experiences waiting for you in Vietnam!


In summary, each option has its own pros and cons, and the 3 mentioned above have worked well for our travelers in the past. You might find another option that suits you better. No matter which airport transfer you choose, you’re in for an amazing time in Vietnam! Keep in mind that you’ll need a visa to enter the country—if you want to know more about how to get your Vietnam e-visa, check out our detailed blog post. Happy travels!

vietnam cambodia travel tips 

How to get a Cambodian Visa at Siem Reap Airport

By globedrifters Vietnam/Cambodia

Getting a Cambodian Visa at Siem Reap Airport

Getting a Cambodian Visa on arrival at the Siem Reap airport is a pretty easy affair and it is outlined in the 4 steps below. You can also apply for an e-visa online ahead of time—check out our blog for details: How to Get a Visa for Cambodia.


1.) Complete forms during your flight.

Cambodia now requires all travelers arriving by air to complete an electronic Arrival Card (e-Arrival Card) within 7 days prior to your arrival. This replaces the old paper arrival/departure card. You can fill out the e-Arrival Card online at arrival.gov.kh.

During your flight to Siem Reap (airport code SAI), you may still receive the following paper forms:

  • Application Form for Visa on Arrival

  • General Department of Customs and Excise Passenger’s Declaration (Customs Declaration Form)

If you don’t receive the forms from the flight crew, just ask. And if they’re not available on the flight, don’t worry—you can pick them up at the airport once you land. That said, you’ll likely receive them in-flight, which gives you time to fill them out with your own pen (ink pens are rarely provided at the airport). If you have questions, a flight crew member can usually help.

Cambodia Visa on Arrival Application Form 

General Department of Customs and Excise Passenger’s Declaration (Customs Declaration Form)


2.) Receive your visa at the Siem Reap airport visa area

Once you’ve landed and entered the airport, follow the signs for “Visa on Arrival”—they’re typically easy to spot. Be sure to head to the visa counter before going to immigration.

Have the following ready:

  • Passport with at least 6 months validity and 1–2 blank pages

  • $30 USD cash (exact change recommended)

  • Completed visa application and customs declaration form

  • Your e-Arrival Card (submitted online before your trip)

You’ll hand everything over to the visa officer and receive your visa sticker in your passport. The process is fairly quick, but there may be lines during busy periods.


3.) Clear customs and immigration

After receiving your visa, exit the visa area and head to the immigration and customs counters (usually to your left). Here you’ll show your passport, any remaining paperwork, and proceed through biometric screening (fingerprinting and a photo are now standard).

Once cleared, continue to the baggage claim area.


4.) Collect your luggage and start your adventure in Cambodia

After clearing immigration, head to the baggage claim area to collect your luggage. Once you’ve got your bags, you’ll exit into the public arrivals hall, where your guide will usually be waiting if you’ve arranged a pickup. Otherwise, head to the taxi pick-up zone or take a tuk-tuk to get to your destination and start your adventure in Cambodia.


Getting a Cambodian visa is easy, whether you get it on arrival at Siem Reap airport or apply online with an e-visa. For more details, follow the steps above or visit our blog: How to Get a Visa for Cambodia.

Happy travels!

hang-son-doong-cave-vietnam2 

Son Doong Cave – Quang Binh Province, Vietnam

By globedrifters Vietnam/Cambodia

Son Doong Cave – Quang Binh Province, Vietnam

Imagine trekking straight into the depths of the world’s largest cave on an expedition unlike any other. A jungle within a cave, that’s almost so unreal that you have to see it to believe it. Misty clouds enveloping the whole scene, evidence of the cave’s own weather system. Fossil passageways that give proof of the cave’s ancient existence. – Oxalis Adventure Tours (Son Doong Cave Expedition) 

150319-news-son-doong-vietnam-cave-vin

Right now there is only one tour operator that is permitted to take you into this cave, Oxalis Tours. For a 5 day/4 night trek it will cost you $3,000 USD and includes 2 nights before and after the cave expedition. They operate from February to August with 10 travelers maximum. They also offer a photography trip.

hang-son-doong-cave-vietnam2

It is a pretty difficult trek, but this would be a perfect excuse to get in tip-top shape again. It really is a once in a lifetime chance since there is only one tour operator out there that can take you on this expedition. Getting to the entrance of the cave is also a trek and there are no signs to point you in the right direction, so a guide is very important to help you find your way to the cave.

e1cvoiqixrtxl405gnwyzotlb7f3zoe48n2ngjbg9ewnsqksckpiornvrzpdnbruhsluhrdjaxzhusjpcmf1hu.jpg__800x600_q85_crop

son-doong-cave-nature_130768


Koh Rong Samloem Island, Cambodia

By globedrifters Vietnam/Cambodia

Koh Rong Samloem Island, Cambodia

Koh Rong Samloem is an island off the coast of Cambodia and is not to be confused with the similarly named Koh Rong island, which is 4 kilometers north of Koh Rong Samloem. To get to this island you must take a boat from the beach town of Sihanoukville which takes around 45 minutes (by speed boat).

Koh Rong Samloem is a deserted island paradise; so deserted that the show ‘Survivor’ filmed 2 seasons here and has a permanent base camp on the island for the production team to stay in.

If you had gone to this island 10 years ago you would have only had one choice in accommodation and very limited amenities. With each passing year, more and more bungalows are popping up, making the most of what is essentially an ‘island paradise.’

The island is known for its white sand beaches and crystal clear blue waters. Many areas claim to have these traits but when you show up the water is dark and the sand is yellow but this island truly has the white sand and crystal clear waters!

What makes this island special is the lack of development making it a tranquil place to relax and although this island used to only draw the backpacker crowd due to the ‘basic’ accommodation the recent fast growing development on the island is drawing more visitors than ever before but don’t worry, the ambiance has not been lost……yet. The future of Koh Rong Salmoem is not looking good.  The island was leased out for 99 years to the Royal Group who plans to push out the bungalows on the island and build Asia’s first environmentally planned resort and I am guessing to stay at this soon to be resort will cost more than a pretty penny so now is the time to go before the development starts.

The island is not for…..for the lack of a better word ‘diva’ as it is completely off the electrical grid with most bungalows only offering electricity for 4-5 hours a day, usually between 6-11 pm but there are a few bungalows now that offer electricity 24 hours a day. Hot water is I believe in only one or two ‘hotels’ on the island and there are no ATM’s, no vehicles, no medical clinic and very limited Wifi but who needs wifi when your in paradise! There are very small villages here as well that you can visit and hang with the locals.

A favorite activity to do here at night is swim with the bioluminescent plankton.  You can either take a boat about 5 minutes off the coast or just walk out into the ocean until you see the plankton light up!  The plankton do bite and it is not necessarily a throbbing pain but can become quite the nuisance to the point that you can only spend about 5 minutes in the water before getting on the boat and that is why I suggest not going on a boat and just find a dark spot on the island (which there are many) and walk out until you are about stomach deep and then start moving your hands and feet and you will see the plankton light up. The movement in the water makes the plankton light up and if you bring a mask and snorkel this would be ideal.  It is not necessarily the bioluminescent plankton that is so awe-inspiring but a combination of things.  Since the island has very little light pollution and is far from the main land the stars are in the sky number in the thousands. You will see more stars in the sky then you have ever seen before!  So the combination of the starry sky, the bioluminescent plankton, secluded beach in warm waters makes for a pretty amazing moment and this is why Koh Rong is top on my list of things to see in Asia.

If you are looking for places to stay we suggest Saracen Bay Resort.  If you plan on going in peak season November to February we suggest booking way ahead of time as rooms can fill up fast as many of the bungalow hotels only have 4-10 bungalows to rent so very limited.  Saracen Bay Resort does have 24 hour electricity but no hot water and fan only.  The restaurant on the premises is probably the best on the island and the rooms are really well appointed compared to most other bungalows that are more for backpackers with basic amenities.

Survivor-Koh-Rong

koh-rong-long-beach

koh rong use

Joe Ac small house

Villagers in Koh Rong: Photo credit – Joe Achacaso

Joe ac small village

Village in Koh Rong: Photo credit – Joe Achacaso

plankton

As you move your arms and legs this is what it looks like underwater. The amount of plankton just depends on how fast you move your arms and legs.

saracen bay resort

Bungalow at Saracen Bay Resort

saracen-bay-resort view from room

View from Bungalow at Saracen Bay Resort